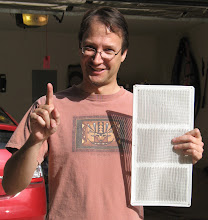
After doing my own research, the most effective products looked to me like the industrial-grade foil radiant barriers. The paints seemed a little dicey to me; there were a lot of questions about their effectiveness, and the very best I found looked like they blocked about 70% of radiant energy. In contrast, the foil products were rated well over 90%, with the one I chose at 97% reflectivity.
The questions: how much did I need, and how could I get it installed?
To examine the first question, I first had to answer the second one, because there are 2 accepted ways of installing the barrier.
Method 1: roll the aluminum foil out across the attic floor, on top of the existing insulation. In this case, I would need exactly the (estimated) square footage of the attic in foil.
Method 2: staple the aluminum foil to the underside of the rafters. In this case, I would need a bit of extra foil, to account for the slope of the roof and the inevitable sagging of the material between the rafters.
I estimated the area covered by my attic, including the garage, and multiplied by a factor slightly greater than 1 to account for the pitch of my roof. My roof is a 5/12 roof; that is; 5 inches of rise for every 12 inches of horizontal length. That, if my math was correct, required about 2200 square feet of barrier, assuming I could physically access everywhere I wanted to put it.
The radiant barrier itself, which I purchased from these good folks , came in 1000 square foot rolls, with each roll 4' x 250'. Some vendors also sell them in 2' wide rolls. At times I liked having the 4' width, but at other times, I had to cut the foil width-wise because I needed narrower sections.
Installing the barrier was a long-term process for me. Since I didn't make the decision to start until late February 2008, and we often start getting good sunshine and heat in March or April, I didn't have that many weekends to get it done. Plus, to be honest, some weeks I just couldn't handle the thought of going into the attic again, so I wasn't the most diligent.
Add to that the fact that there is a good bit of setup time for me; I don't enjoy breathing insulation fibers, or feeling them against my skin for that matter, every time I worked in the attic I put on a paper "bunny suit" (painters often use these; you can get them at Home Depot or other similar stores) as well as an insulation-grade mask. Note: in my experience regular masks, like you might use for lawn care or other basic dust applications are not good enough. Wearing a mask rated for insulation use made a noticeable difference in how much distress I felt in my nose and throat after a session in the attic.
Add to that the fact that, since I used the garage as a staging area for rolling out and cutting sheets of radiant barrier as I needed them, I swept the garage pretty much every time I started a session. Why? Because dust stuck to the radiant barrier reduces its reflectiveness.
With all that, you can see that it took a good while to get started each day. Plus, there is cleanup time to put away the roll, change out of the suit, and shower and rinse out your mouth and throat (if you know how to do neti, do so after leaving the attic for the day - it will help knock out a lot more of those unhealthy fibers.)
So, with the late start in the season, and the overhead of each session in the attic, I was able to complete about half of the attic in my first effort. The parts I chose to cover were over the very sunny east-facing side of the house, which included the master bedroom suite - long recognized as the hottest area of the house in the summer - and a portion of the westward-facing area over the kitchen and garage. The entire middle of the house was left uncovered for the oncoming summer.
However, this did give me the chance to experience a summer of comparison; I could compare the feel of the house "under the barrier" vs. the feel of the area without it. How did that go? Read on, and see!
Sunday, October 11, 2009
Subscribe to:
Post Comments (Atom)


No comments:
Post a Comment