Before I proceed to talk about air outflow, a small diversion into the theory of operation of a modern ventilated attic might be in order. Most of us are taught at a very early age that hot air rises. In fact, this basic principle is the foundation for the entire self-ventilating attic concept, an idea elegant in its simplicity yet apparently surprisingly hard to come by in the real world.
The idea is that the attic will naturally heat up during the day, from radiated heat from the sun hitting the roof as well as convected heat from the house below (cooking, lights, computers, hot showers, etc.) If this heat is given a vent to flow out of, and if there is a suitable vent for cooler air to flow in from, the basic principle of hot air rising will force the hot air out, and the cool air will be naturally drawn in by the reduced air pressure (the suction left behind, if you will). The elegance of this temperature-difference-driven cooling engine is exhibited by the fact that it has no moving parts to wear out and that it uses no electricity. In short, a properly ventilated attic puts the laws of physics to work for you!
So, back to my particular attic. Having satisfied the rule of thumb for the amount of air intake for my size attic, I needed to make sure that my air outflow was properly accounted for. As it turns out, the two small square vents that I had were a good bit short of the net free area that I needed. The net free area is a measure that can be found on all ventilation devices, and it is less than the actual measured area of the device since all of them have some sort of covering, grill, or mesh that impedes airflow. In addition, my vents were a good 30% below the ridgeline of the roof. In other words, the top 30% of my attic airspace would heat up all day, and never leave the house. This, once I thought about it, was intolerable. I was keeping the hottest portion of the air in, while venting the cooler portion out! I might as well have stood there all night, tearing up dollar bills, because that is effectively what my house was doing via my energy bills.
In short, dear readers, the situation with my attic outflow was intolerable. How could I best get more outflow area? How could I get it located higher up on the roof? I returned to my computer and began more web research...
Thursday, August 27, 2009
Monday, August 3, 2009
Intake Inspiration

Ah, many are the Americans who have pondered the means by which to allow more air into their attics. Energy efficiency has called, and we have proudly answered!
Despite my ongoing troubles opening enough channels for the soffit vents to flow through, I realized that the design of my house allowed me one more way to get air into the attic. My back porch is basically a cut-out corner of the rectangle of my foundation, if you will, but over the porch there is some roof (see photo above). The bottom of that roof was unventilated but that could be fixed... but did it connect to the attic airspace?
Imagine my triumph as I realized that it did when I spotted the top of my porch light from the recesses of the attic. Imagine, if you even can, my further triumph when I realized that this porch was right in the middle of the longest run of unventilated vaulted ceilings.
Although the area is mostly inaccessible from the attic, I was able to cut out holes for some grill vents from below with the help of a drill to get started, and a handy tool called a keyhole saw, borrowed from my helpful neighbor. Although I got a face full of insulation for my trouble (why they insulated over the porch I don't know), I was able to place two grill vents each of which carried more air than several baffles. In short, it was no less than a full-on ventilation coup.
Here is a picture of the grill vents from below.
 Now, although my intake problem was not fully solved, it was as good as it was likely to get for a while. With that, I turned my attention to the complementary problem: outflow of hot air.
Saturday, August 1, 2009
Moldy Mission Creep
My goal: open up the blocked channels to allow airflow. The channels were each defined by two ends, one in the attic and one at the soffit vents leading outside, and 4 sides: the roof on top, the sheetrock of the ceiling on the bottom, and two wooden rafters. They were completely filled with insulation.
My plan: Clear the channel, slide in a baffle along the top, staple the baffle in place against the roof, then slide the insulation back in place. The difference: with the baffle in place pressing down on the insulation, the air could flow in through the soffit vents then pass above the insulation and into the attic.
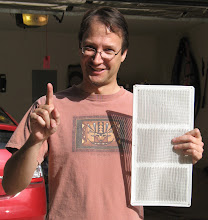
Note: A baffle is an inexpensive piece of plastic or styrofoam that is shaped to create an airspace. Mine look something like 4 foot long rectangles with 2" edges sticking down along the sides, but open at the ends to allow the air to flow through.
Here's a cross-section looking down the long (open) axis of a baffle that I've added radiant barrier to (more on that project that later). It's about 4 ft x 2ft x 2 inches.

Of course, opening up the blocked channels leading from the attic down the slope to the soffit vents a good 8 feet away entailed removing the insulation. At this step, I noticed that a lot of the insulation that I was removing was infested with a good amount of dark colored junk, almost certainly mold. I live in a humid climate, and mold is certainly not unusual. However, recalling that discretion was sometimes the better part of valor, and I decided to replace the insulation with new stuff. Much of my reading on attics detailed how improper ventilation creates good conditions for mold growth.
I was now entering the phase that many of you engineers out there may recognize: mission creep (or for you software folks, feature creep). That is, the point at which you start to decide that some new activity that touches on your original activity really should get done.
In this case, the mission creep added new steps for each channel to be cleared. Each channel now required:
Now I had cleared all the channels that I could physically get to in the attic. It still wasn't enough, but it was a help.
* Again, Efficiency Man recommends that you hire a trained professional for extensive attic work, for reasons of comfort and safety. If you must do the work yourself, protect your lungs with a mask rated for insulation, and your skin with a good covering.
Next: A ray of intake inspiration
My plan: Clear the channel, slide in a baffle along the top, staple the baffle in place against the roof, then slide the insulation back in place. The difference: with the baffle in place pressing down on the insulation, the air could flow in through the soffit vents then pass above the insulation and into the attic.
Note: A baffle is an inexpensive piece of plastic or styrofoam that is shaped to create an airspace. Mine look something like 4 foot long rectangles with 2" edges sticking down along the sides, but open at the ends to allow the air to flow through.
Here's a cross-section looking down the long (open) axis of a baffle that I've added radiant barrier to (more on that project that later). It's about 4 ft x 2ft x 2 inches.

Of course, opening up the blocked channels leading from the attic down the slope to the soffit vents a good 8 feet away entailed removing the insulation. At this step, I noticed that a lot of the insulation that I was removing was infested with a good amount of dark colored junk, almost certainly mold. I live in a humid climate, and mold is certainly not unusual. However, recalling that discretion was sometimes the better part of valor, and I decided to replace the insulation with new stuff. Much of my reading on attics detailed how improper ventilation creates good conditions for mold growth.
I was now entering the phase that many of you engineers out there may recognize: mission creep (or for you software folks, feature creep). That is, the point at which you start to decide that some new activity that touches on your original activity really should get done.
In this case, the mission creep added new steps for each channel to be cleared. Each channel now required:
- Surveying the channel to see if there was room for my body in front of it
- Clearing space from the blow-in insulation for my movable flooring
- Putting in movable flooring to work off of
- Reaching far down the channel for the old insulation (with my handy-dandy broom handles to assist in compression and grabbing; otherwise the insulation would just tear and not move)
- Removing (and plastic bagging for safety) the old insulation
- Creating a double-length-baffle (the store baffles were too short; I had to staple two overlapping to get the length and strength required to put them down the channel).
- Sliding and stapling the baffle in place against the underside of the roof.
- Unrolling, measuring, and cutting new insulation
- Stuffing the new insulation down the channel (involving the broom handles and creative vocabulary as the insulation snagged on roofing stapes, large splinters, and stray pieces of plywood lining the channel)
- Removing the temporary flooring
- Restoring the blow-in insulation underneath me as best I could
Now I had cleared all the channels that I could physically get to in the attic. It still wasn't enough, but it was a help.
* Again, Efficiency Man recommends that you hire a trained professional for extensive attic work, for reasons of comfort and safety. If you must do the work yourself, protect your lungs with a mask rated for insulation, and your skin with a good covering.
Next: A ray of intake inspiration
The Tip of the Intake Iceberg
After a winter of reading and plotting, I decided it was likely that I indeed did not have enough ventilation in my attic. The various guidelines (such as this), most of which seem to be rules of thumb, seem to show that I'd need about 6-7 square feet of ventilation, evenly split between inflow to the attic and outflow from the attic for my 2000 square foot house. Some folks debating the topic state that I need double that, which is entirely possible particularly in my hot central Texas climate. What I had existing was approximately 1.5 square feet of ventilation in the roof, and that, not even close to the top where the hottest air would gather.
The villain begins to become unmasked.
My home was marketed to me as fairly energy-efficient, and I do believe that for mid-1990's standard, it was not designed too badly. In fact, the continuous soffit venting around the eaves was a good feature for capturing breeze into the attic from any direction. However, design is only part of the equation: installation is another thing entirely. Looking around in the attic, I noticed a new problem: nearly half of my soffit venting was blocked by improperly installed insulation. This, added to my decidedly under-vented roof, revealed more of my problems.
The reason for the blocked ventilation was soon revealed: roughly half the house has vaulted ceilings (also called cathedral ceilings). These are the areas where the ceiling, when viewed from inside the house, slopes downward to the walls, rather than being flat all the way across. When viewed from above in the attic, the slope starts at the attic floor and goes downwards towards the outside wall. The problem is that the roof is only about a foot above this slope, creating a foot-tall channel that can be easily blocked by insulation batts (the rectangular pre-cut pieces of insulation).
Problem: Seemingly insufficient soffit air intake to the attic
Cause: Nearly half the inflow (soffit) vents are blocked
Solution:
Air could not flow out the top of my attic if replacement air could not flow in from the bottom. So, in the first real preview of the Efficiency Man spirit, I decided to start crawling around in the attic and opening up blocked channels where I could.
Note: Doing this yourself is not for the faint of heart, short of breath, poor of balance, or lacking of insurance. Working in the awkward spaces, often without proper flooring, while wearing a hat, disposable paper suit, mask and gloves to protect from the insulation fibers, makes just moving around up there difficult. Add to this the poor lighting and the dust you inevitably stir up, and you quickly realize that working in attics is tough on your health, and, as a bonus, hazardous - there are nails poking out in many places, ducting to trip over, and wiring to avoid. Although you should practice the Efficiency Way whenever you can, know your limits and hire a professional for extensive attic work. I personally want to avoid the attic for a good while after this.
Water Heater Part 2: The mystery deepens
The recalcitrant gas hot water heater in the attic still had more to teach me. It continued to periodically extinguish itself. As the summer of 2006 went on, I got tired of going up every few weeks to relight the pilot light. I called a plumber, who, streaming sweat from being in my sauna-like attic, complained that the attic was too "tight". Having recently learned insider terms like "tight", I knew what he meant. Was it possible that there was not enough airflow through my attic? Why should there be airflow through the attic at all? There were, in fact, two small attic "turtle vents" just above the hot water heater, although their placement on the roof roughly 30% below the peak seemed counterintuitive even to the not-yet-Efficiency-Man me of 2006. And finally, was it conceivable that lack of airflow was so bad that it was choking my pilot light due to lack of oxygen?
Intrigued, I began to Google and read up on what I found.
What I discovered, dear readers, has formed the main portion of my energy-inefficiency-fighting career to this point. The biggest opportunities for energy efficiency in your home, and for fighting the triple behemoths of Energy Inefficiency, Large Utility Bills, and Not So Comfortable Home, can be found right upstairs in the attic.*
Incident: Continually failing pilot light
Problem: Seemingly insufficient airflow
Solution: Stay tuned...
* This is true in my neck of the woods, central Texas. From what I have read, the attic is the main efficiency issue in many climates, but you should research your own area. Solutions that are appropriate for Efficiency Man may be less appropriate for readers in other areas.
The Beginning: A Lucky Break
It all started back in late spring 2006, when I was in the attic, relighting our natural gas hot water heater for the third time that year. By lucky coincidence, the air conditioning blower unit came on right behind me as I sat in front of the water heater. I felt cool air blowing on the back of my neck, right there in the attic. Even as uneducated as I was at that time in the Ways of Efficiency, I knew that this implied a large waste of resources. Leakage in the air system meant that I was expending energy and money trying to cool the attic, which is connected to the outside world. You can't cool the outside world with an air conditioner no matter how much energy you burn. Note for civilians (non engineers): air conditioners do not cool overall, they simply expend energy to move heat from place to place, typically from inside a space to outside it.
Incident: Conditioned air leak detected in attic
Problem: Normal duct aging
Lesson: After 10 years or so, it is expected that air ducts will be leaky in any building, leaking up to 30% of their air conditioning energy in a futile effort to cool the outside world.
Solution: Do it yourself (Google "duct sealing diy" and do some reading) or pay someone to fix it. At the time I paid a local well-known plumbing contractor to perform a full house leakage test. The crew of two men spent an entire day sealing not only the attic ducts, but looking at every airspace penetration (doors, windows, plumbing that goes through the wall) and sealing it. At the end of the day they performed a fascinating test to prove the system was sufficiently airtight (or "tight" in their term): they covered every air register with plastic, and attempted to use a fan to suck air out of the system from the return air vent. The harder the fan worked, the more tight the system. The system was tight. They then sealed off the main house airspace from the duct work, and replaced my front door with a "blower door", which again had a large fan that attempted to blow air out of the (sealed) house. The harder that fan worked, the tighter the seal of the house. The house was tight; the air duct system was tight; the problem was solved.
Moral: Leaky ducts throw away energy and money. Energy efficiency waits for no man! You know what to do.
Introduction
Welcome to my blog! I am EnergyEfficiencyMan. I became interested in energy efficiency about 5 years ago, probably for the dual reasons of an engineering background and years of utility-bill-laden home ownership. In addition, I read a lot, both on the web and in periodicals. Much of what I have seen and experienced firsthand has made me realize that our society, in particular modern American society, has the following characteristics:
- We have built a world which requires large amounts of incredibly cheap energy to maintain
- We waste between half and 3/4 of the energy we generate without putting it to good use
Executive Summary
For those who don't want to traipse through my entire blog, I'll summarize some of my key findings here along with links to the more detailed entries.
- In 2005 -2006 I got my ducts and house sealed for air leaks and improved my attic ventilation. Reduced energy usage by 40% from my 2005 value.
- In 2007-2009 I installed radiant barrier over almost the entire attic. Energy usage was now reduced by about 60% of my 2005 value.
- Along the way, I learned a lot about energy in human terms, attics, ridge vents, the three heat flow mechanisms, radiant barriers, and modeling to account for weather variations.
Subscribe to:
Posts (Atom)